Gluten Free Gum Free Four Leaf Clover Topsy Turvy Dinner Rolls Recipe
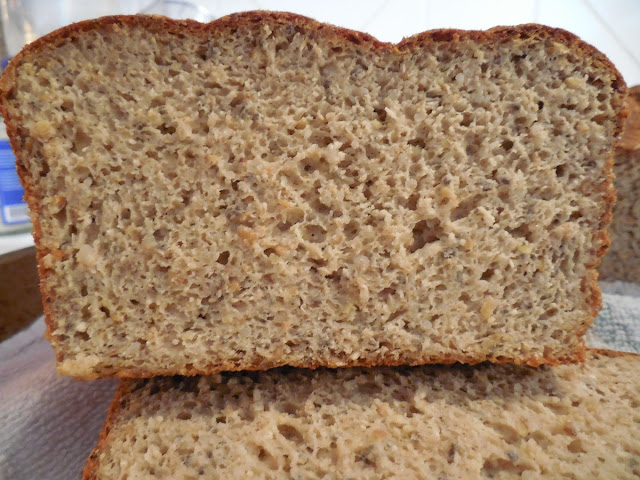
In honor of St. Patrick's Day, maybe the funnest day of the year (after Christmas)... I present to you... Gluten Free, Gum Free, Four Leaf Clover Topsy Turvy Dinner Rolls... (say that 5 times fast!) These gluten free dinner rolls smell like bread, make a hollow sound if you tap them like bread, and I daresay, have the texture of bread... and with no gums. That's not a sacrifice, this recipe doesn't need gums to be fluffy, substantial and believably bready.
The four leaf clover design is even more pronounced on the bottoms, and if you cut them in half, you get two croutons on which to melt cheese for a festive look... Perhaps when you're making Irish onion soup.
Announcement: For this weekend only, it's Irish onion soup ...on loan from Brittany. On Monday, it reverts to French Onion Soup.
Tips for success (first, please read the recipe through before starting):
Yield: about 12-14 dinner rolls
1 Package (10.5 oz) Simple Mills Artisan Bread Flour Mix
2 oz ground flax seeds (because it forms a gel that helps lightness and rising)
2 oz almond flour (because it absorbs oil and adds moisture)
5 oz *SWEET RICE* flour, superfine grind (because it adds springy texture without gum)
2 tsp baking powder
1/2 tsp salt (corrects for extra flour added)
and a pinch of crushed rosemary (optional, I left it out this time)
Mix the dry ingredients well. This flour combo is about double the original, so I mostly doubled the measures on the box. Use two measuring cups... cup 1 has only the oil, cup 2 has the other liquid ingredients.
First measuring cup:
Measure 1/2 cup oil (8 Tbsp), and set aside. I used Organic (refined) Sesame Oil, it's easy to find and fairly neutral. But use what you like.
Add items in this order to the 2nd measuring cup:
4 eggs, and then beat them
fill up to 1 cup with yogurt of your choice
fill up to 1 1/2 cups with water or milk of your choice
Combine them thoroughly. *
A sprinkle of coarse salt - for topping, before the dinner rolls go in the oven.
Pour the contents of Measuring cups 1 and 2 on the flour, starting with the oil, combine with a spoon or spatula, it might be stiff at first, you may need to slide under the dough and flip it over. After it's mixed well, it will seem too sticky and runny. If it doesn't get to the sticky/runny phase, add a 1/4 cup of water, and beat until you can run a spoon around in circles (in the same direction**) as if through a very thick, stiff, lumpy, pancake batter.
Allow to rest for 90 minutes, covered. During this time, the starches are being hydrated, the yogurt probiotics are chowing down on other starches, and the flax seeds are releasing the magic binding gel that they release. It would be better if you gave it a vigorous stir every 30 minutes, 3x, but this is not strictly required if you stirred well at the beginning.
After the 90 minutes, the dough should be extremely hard to stir and it's better if you stir it by sliding a spatula underneath and flip it up over the top, then press down (as if kneading). Keep it up until it's too tiresome, or the dough gets slightly less sticky. If you pick up a piece in a spoon, and release the dough, it should not pour out, it should drop in a clump.
Troubleshooting: If the dough is still too runny, leave it uncovered for 10 minutes, stir slightly, and repeat until the dough has dried a bit. Worst case, use super fine sweet rice flour (or superfine potato flour), 1-2 tablespoons at a time until it dries a bit. This can happen because the consistency of the flours aren't perfect and the flax seeds may release more gel than expected. Usually this is not required.
Turn the oven on to 350 F and allow to preheat.
Put on gloves, this is the fun part!
Prep two sheet pans with a layer of aluminum foil and grease them. I used liquid coconut oil, but I think next time I'll use sesame oil, it's thicker.
Get your gloved hands very oily, and pick up a small handful of dough.
Roll the dough around like you would when shaping a meatball, this will make a smooth exterior, but the result is generally flat and oval, not round like a meatball. Place it on the prepared pan. Use your fingers to press two sides together, and then repeat to form an "X" shape. Use your fingers to pinch the center of the X a bit. This forms the four "lobes" of the lucky cloverleaf.
Repeat with the rest of the dough until it is all gone.
Tip: The X shape should be very well defined before baking. During baking the pattern will soften a bit, and the center may tear in a pleasant bread-like way. But there should be no huge cracks after baking if you keep your hands well oiled.
Sprinkle with rosemary and/or coarse salt, and bake for 20 minutes.
Rotate the pans, and bake another 10-15 minutes. Done when they sound hollow when tapped and the tops look rosy but not dark. I should maybe have put egg wash on there, maybe could get creative and draw something in egg white. But I think they're lovely anyway, maybe next time. Allow to cool almost completely before enjoying (ha!).
More tips:
* Don't mix the oil with the rest of the wet ingredients, because it will emulsify, which is good sometimes, but in this case I want some of it to be absorbed by the flour first.
** Old cookbooks still give this advice (to stir in only one direction). I suspect it comes from a time when flour wasn't necessarily "fine" wheat flour and the proteins that were present had to be coaxed into becoming organized (in this case the most significant one is the sweet rice proteins). If you're a science geek like me, you'll love this thread on an engineering forum. But seriously, even a mechanical dough hook doesn't stir both ways.
Ahem, a shout out to Alton Brown is probably in order. He ruined me for following baking instructions. Now it's a matter of SCIENCE! Thanks, man..... I think.
The four leaf clover design is even more pronounced on the bottoms, and if you cut them in half, you get two croutons on which to melt cheese for a festive look... Perhaps when you're making Irish onion soup.
Announcement: For this weekend only, it's Irish onion soup ...on loan from Brittany. On Monday, it reverts to French Onion Soup.
 |
| All I need is a few gold coins from a Leprechaun's hoard, coffee and bread. |
Tips for success (first, please read the recipe through before starting):
This recipe is a bit involved, with the hydration time, it's about a 2 and 1/2 hour project, though 3/4 of that time is just waiting for hydration. There's an easier version, out of the box by Pamela's here or a Shamrock rolls recipe from another wonderful blogger. (always good to have a backup plan!)
Gum free, gluten free recipe. Starting with a balanced but a bit low-inflating flour, Simple Mills Artisan Bread Flour Mix...
I nearly doubled the flour with my own blend (by weight) and then used double the wet ingredients, plus more baking powder.
I added more eggs and more water than I ever thought would be absorbed, the goal being, soft and fluffy rolls. It worked!
I'd made the mix before according to the box directions, and I noticed a distinct vinegary aftertaste, so I swapped the vinegar out and swapped in some thick greek yogurt.
I always leave the batter for at least 30 min to hydrate the dough, but this time I left it for 90 minutes. You might want to pop it in the fridge while hydrating, but I left it on the counter.
Baking soda would've been more traditional, so feel free to use it, but my kvetch about that is, it might be gone by the time the hydrate step is over.
Use gloves when forming the dough... nitralon gloves are my favorite.
Oil the gloves thoroughly and repeatedly while forming the rolls. Your fingertips will get sticky with dough and then you can't shape it easily... oil your gloved hands again at that point, over the sink. You can pour some oil in a bowl near you so the oil container stays clean.
This dinner roll recipe is absolutely loaded with eggs and if your trouble with milk goes deeper than lactose, then you might want to swap the yogurt for some non dairy yogurt. Can't advise you on how to skip the eggs, I haven't tried.
Use a scale and measure the flour by weight, do not try to use "cups" or any other measure for the flour. The goal is to nearly, but not quite, double the flour amount in the box.
Gluten Free and Gum Free Four Leaf Clover Topsy Turvy Dinner Rolls
Don't start heating the oven yet, but it will be a medium oven, 350F. You can prepare the pans now or later. (gums are not needed in this recipe)Yield: about 12-14 dinner rolls
 |
| Noroc și Bani! (Luck and Money) |
2 oz ground flax seeds (because it forms a gel that helps lightness and rising)
2 oz almond flour (because it absorbs oil and adds moisture)
5 oz *SWEET RICE* flour, superfine grind (because it adds springy texture without gum)
2 tsp baking powder
1/2 tsp salt (corrects for extra flour added)
and a pinch of crushed rosemary (optional, I left it out this time)
Mix the dry ingredients well. This flour combo is about double the original, so I mostly doubled the measures on the box. Use two measuring cups... cup 1 has only the oil, cup 2 has the other liquid ingredients.
First measuring cup:
Measure 1/2 cup oil (8 Tbsp), and set aside. I used Organic (refined) Sesame Oil, it's easy to find and fairly neutral. But use what you like.
Add items in this order to the 2nd measuring cup:
4 eggs, and then beat them
fill up to 1 cup with yogurt of your choice
fill up to 1 1/2 cups with water or milk of your choice
Combine them thoroughly. *
A sprinkle of coarse salt - for topping, before the dinner rolls go in the oven.
Pour the contents of Measuring cups 1 and 2 on the flour, starting with the oil, combine with a spoon or spatula, it might be stiff at first, you may need to slide under the dough and flip it over. After it's mixed well, it will seem too sticky and runny. If it doesn't get to the sticky/runny phase, add a 1/4 cup of water, and beat until you can run a spoon around in circles (in the same direction**) as if through a very thick, stiff, lumpy, pancake batter.
Allow to rest for 90 minutes, covered. During this time, the starches are being hydrated, the yogurt probiotics are chowing down on other starches, and the flax seeds are releasing the magic binding gel that they release. It would be better if you gave it a vigorous stir every 30 minutes, 3x, but this is not strictly required if you stirred well at the beginning.
After the 90 minutes, the dough should be extremely hard to stir and it's better if you stir it by sliding a spatula underneath and flip it up over the top, then press down (as if kneading). Keep it up until it's too tiresome, or the dough gets slightly less sticky. If you pick up a piece in a spoon, and release the dough, it should not pour out, it should drop in a clump.
Troubleshooting: If the dough is still too runny, leave it uncovered for 10 minutes, stir slightly, and repeat until the dough has dried a bit. Worst case, use super fine sweet rice flour (or superfine potato flour), 1-2 tablespoons at a time until it dries a bit. This can happen because the consistency of the flours aren't perfect and the flax seeds may release more gel than expected. Usually this is not required.
Turn the oven on to 350 F and allow to preheat.
Put on gloves, this is the fun part!
Prep two sheet pans with a layer of aluminum foil and grease them. I used liquid coconut oil, but I think next time I'll use sesame oil, it's thicker.
Get your gloved hands very oily, and pick up a small handful of dough.
Roll the dough around like you would when shaping a meatball, this will make a smooth exterior, but the result is generally flat and oval, not round like a meatball. Place it on the prepared pan. Use your fingers to press two sides together, and then repeat to form an "X" shape. Use your fingers to pinch the center of the X a bit. This forms the four "lobes" of the lucky cloverleaf.
Repeat with the rest of the dough until it is all gone.
Tip: The X shape should be very well defined before baking. During baking the pattern will soften a bit, and the center may tear in a pleasant bread-like way. But there should be no huge cracks after baking if you keep your hands well oiled.
Sprinkle with rosemary and/or coarse salt, and bake for 20 minutes.
Rotate the pans, and bake another 10-15 minutes. Done when they sound hollow when tapped and the tops look rosy but not dark. I should maybe have put egg wash on there, maybe could get creative and draw something in egg white. But I think they're lovely anyway, maybe next time. Allow to cool almost completely before enjoying (ha!).
More tips:
* Don't mix the oil with the rest of the wet ingredients, because it will emulsify, which is good sometimes, but in this case I want some of it to be absorbed by the flour first.
** Old cookbooks still give this advice (to stir in only one direction). I suspect it comes from a time when flour wasn't necessarily "fine" wheat flour and the proteins that were present had to be coaxed into becoming organized (in this case the most significant one is the sweet rice proteins). If you're a science geek like me, you'll love this thread on an engineering forum. But seriously, even a mechanical dough hook doesn't stir both ways.
Ahem, a shout out to Alton Brown is probably in order. He ruined me for following baking instructions. Now it's a matter of SCIENCE! Thanks, man..... I think.


