Super Chunky Spaghetti Sauce and Lecsó
 |
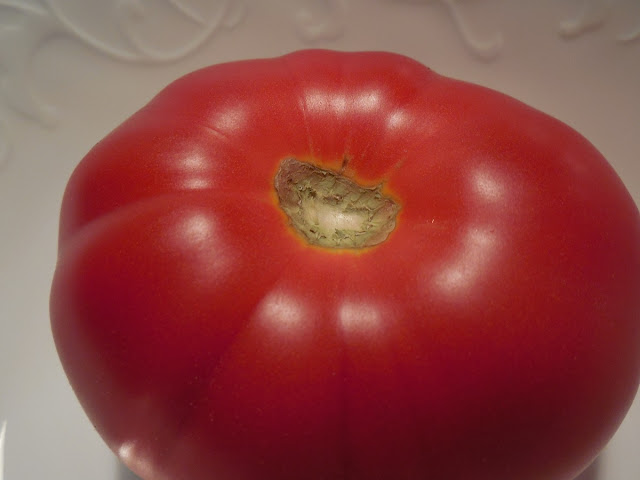
| Local organic tomato at the peak of ripeness! |
Welcome once again to my blog! Today we're talking about homemade spaghetti sauce with fresh local tomatoes, garlic, onion and peppers! With 10 lbs each of tomatoes, onions and bell peppers, you can make enough Lecsó and Spaghetti sauce to last several months. I've made three batches so far this year and before the season is over, I want to share my methods with you. I developed a new technique that enhances flavor and protects the vitamins in the sauce from being overcooked.
The advantages of big cooking (making a lot, ahead) are the fresh ingredients, the flavor and the thrift. Let's get started!
You may wonder what Lecsó is, so let's talk about it first. Simply put, it's a "bam" for taking a healthy shortcut when making many dishes, especially braised dishes from Eastern Europe. Lecsó is made a bit more simply than spaghetti sauce, so I tend to cook a large batch, and divide the results so I get some Lecsó and some Spaghetti sauce. Lecsó is less spicy and may be eaten as a meal. It has several traditional finishing touches when it's eaten as a meal.
 |
| Lecsó with Sausage and Forbidden Rice |
What is Lecsó?
Lecsó is pronounced like "let"+"cho" and many online cookbooks have it written, Anglicized, as Lecho or Leche. I've even seen Leczo as a spelling. The final ó is pronounced like saying "oh." It's often called Hungarian Lecsó but anthropology tells us it's Serbian in origin. In Eastern European food markets you might find jars of Lecsó ready to be bammed into any braised dish. Preserved Lecsó tends to be more oily and more of a spice than a meal. You could make it that way, but this recipe is for the version that can be used as either a spice or a meal.A really simple video for lecso follows. It's how you would make it during the summer when you have fresh ingredients and you don't intend to store any of it for winter in your freezer. It begins with kolbasz, and substitutes for that are Polish kielbasa, or Anduille sausage. It's a very simple, fresh and juicy dish.
Lecsó sounds almost too simple, you chop the tomatoes, onions and peppers. Saute the onion and pepper in a bit of olive oil, sausage, bacon drippings, or schmaltz, and simmer all together for about 45 min to an hour. Taste for seasoning, and done. This is also the beginning instructions of spaghetti sauce, except with sauce, you cook it down until it's thickened and add traditional herbs like oregano and basil. In my recipe I took care to not spoil the spaghetti sauce flavor by adding flavors that are unusual in that. Those flavors are added later to my lecso, once the recipes are separated.
Don't let the simplicity of Lecsó fool you, Lecsó is a power pack of antioxidants and its secret is in not being cooked very long. The flavor is intense and satisfying.Traditionally, rendered pork lard, or traditional pork sausage, is used for best flavor, but since that would interfere with making it into spaghetti sauce also, I've switched to olive oil.
I've wondered what people did for a savory flavor addition before new world vegetables came on the scene. Tomatoes and peppers are both New World foods. I can make guesses that tart vegetables and fruits were probably used and the French Ratatouille is probably an older version of Lecsó. I'm guessing that bitter gourd or amla may have been used , but of course the flavor of bitter gourd is very different, though not unpleasant to me. Amla is one of my favorite Indian market discoveries. If you find it frozen, give it a try when just barely thawed. See what you think. Maybe someday I'll experiment with making a tart, savory sauce using only old world vegetables.
Lecsó Spices
If I were making only Lecsó I would probably add more spices from the start, but some of these spices are not harmonious in Spaghetti Sauce so I leave everything but the garlic, salt and pepper out. All of these are perfectly fine in the following Lecsó meal ideas. Hungarians don't consider many of these spices to be traditional, so if you're going for authenticity, skip all except the garlic and S&P.
- Garlic, fresh
- Ginger (or if you can find it, galangal) root fresh
- Marjoram, crushed
- Cumin, powder
- Coriander seeds, crushed
- A bit of fresh horseradish, grated
- Hot chili pepper, such as Jalapeño or Hungarian Wax Pepper
Lecsó Meals
When made with eggs, a turmeric based curry spice is nice. I use scrambled eggs and just add them to simmering Lecsó. I've also added a bit of it to a frying pan, and then scrambled it into eggs for breakfast.
With pork sausage, it needs no other spices. The Hungarian kind is called Kólbász and it's a fermented pork sausage that uses a lot of garlic, paprika and a cold smoking process. I haven't been able to find a brand of Kólbász that I can safely recommend to people with Celiac Disease, so I hope someone will offer one someday. Meanwhile, some Andouille sausages are similar in flavor and safe for people with Celiac.
When made with rice (or another Celiac safe grain), I like to make it Cantonese style and add a bit more pepper and a sprinkle of sugar. This version is best as a side dish, or with cooked chicken added as a protein, though tofu goes very well in it, assuming you like tofu.
More Ideas
Spaghetti Sauce
Spaghetti Sauce needs very little introduction, it's the ubiquitous pasta sauce used in the US for everything from side dishes to roasted meat topping. It's also the base for sloppy-joes and the sauce in pizza (though, with different spicing). Spaghetti sauce can be used as a flavoring, the same way that Lecsó is used, however its flavor will be distinctive due to the spicing and longer cooking.
A fully homemade spaghetti sauce can't be beat in terms of flavor and, usually, thrift. However, a lot of the thrift is lost if a person insists, as I do, that the vegetables should be Organic. With certified gluten free and organic labels on a jar of Spaghetti Sauce, a person is looking at paying from $7-10 per jar! So there's still a savings and I calculate that with local produce I can realize a $3-5 savings by making it from scratch. If I were to grow my own tomatoes, and peppers, the amount saved would be even more profound.
Perhaps the most persuasive reason to make your own jars of spaghetti sauce is, that you don't need to "doctor" the sauce at all to make it good. I've never met a jar of spaghetti sauce from a supermarket that didn't need any "doctoring" before use. However, when I make it myself, the sauce is perfect every time. This too, is a savings, though it's harder to put a number on it. But I've started to look at store items like this: If the price is $7.29, then by the time I've doctored it up, it's $8.29. Can I make something perfect for less?
Spaghetti sauce is a staple pantry item and culinary velcro for all sorts of uses. It's worth putting some effort into.
The Recipe
Time
- 2 hours prep
- 2-3 hours simmering
- 1 hour cooling
- 30 minutes packing up and rinsing the pots out
Equipment
- Two or three frying pans, as large as possible. You can make do with one, but even with three, you still need to work in batches.
- A food processor or food mill for the tomatoes. You can make do without it, but you'll be chopping a lot more, and losing some of the juices.
- A large strainer or colander with small holes.
- Two pots, a stock pot, and a large wide stew pot.
Ingredients
10 lbs each, tomatoes, onions, bell peppers (plan on about $60-80 for Organic)
One entire head of garlic, separated into cloves and peeled here's an easy way
2 Tablespoons of salt
1 teaspoon of pepper
Optional: 1 teaspoon marjoram, dried crushed (marjoram has a less intense, more herbal, oregano flavor)
For Italian Spaghetti Sauce: Italian seasoning mix (check for GF!), oregano, basil, parsley, hot pepper if desired, from the garden if possible.
1. Begin by washing and chopping the onions and bell peppers. It helps to have two people working together. Wear swim goggles and breathe through your mouth only to avoid the crying reaction that cutting onions produces. I just tough it out, but the swim goggles and only breathing through the mouth method does work.
2. As you chop, pay attention that you don't leave too many large pieces of the tough skin of tomatoes and peppers. Don't cut the skin into long strips, especially. These will peel off and roll up in the sauce, causing an unpleasant thready mouthfeel. If you cut them square enough or triangle enough, it won't be so noticeable. Alternatively, use a food mill after the sauce is cooked, but this mashes the sauce and makes it too smooth in my opinion. I'd rather cut carefully. I leave the veins and part of the bell pepper cap in the sauce, because it adds flavor. If you prefer to leave it out, that's OK.
With tomatoes, if you're cutting them to eat, you're cutting them into wedges usually. But if you cook them this way, they produce rolled up threads of skin which aren't yummy. This is another reason why I prefer to use the food processor on the tomatoes.
3. You have two alternatives, you can chop and roast the bell peppers in the oven (At 450 F, for 12 min) or you can saute them with the onions. As you chop, fill frying pans with olive oil, peppers and onions, sprinkle with a bit of salt, and allow to saute until they develop a little color. Bonus if you manage to get the peppers to develop singed areas. This step may be fussy, but it repays you in flavor. Use some shallots too if you have them.
As each batch becomes a bit toasted (about 10 minutes in a pan that's not too crowded), drop them into the stockpot. No heat yet, we're just collecting.
When all the onions and peppers are sauteed and added to the stockpot, mash and peel garlic (reserve 5 cloves for later), and add it in chunks to a frying pan, and saute it until it gets a tiny bit brown around the edges. Add the garlic to the stock pot to give a roasted garlic flavor. Now you can start the heat under the stock pot. Do not add water.
4. If desired, you can now deglaze the frying pans with wine and add the liquid (no more than a half cup) to the stock pot. Alcohol helps release more flavor from spaghetti sauce and it's an ideal flavorful liquid for deglazing. You can also use beef or vegetable broth, but chicken broth wouldn't taste right. Remember that flavors intensify as you thicken a sauce, so be sparing.Use medium heat at first, after the tomatoes are in and you've reached a simmer, you should reduce it to medium low, I use 3 out of 10 on my electric range.
5. Add the salt and pepper. You may add half of it if you are afraid it will be too much, but don't leave it out or postpone it. After making a few batches, I've found this to be the right amount for me. Your taste may differ from mine though.
The First Simmer - Lecsó
6. Roughly chop the tomatoes and add them to a food processor until it is 2/3 full. Then buzz them until nearly smooth and pour into the stockpot. Repeat until all tomatoes are in the stock pot. (I usually save a couple for eating though).
7. Stir the sauce and rinse cutting boards, frying pans, and food processor parts. Very loosely cover the pot, or use a mesh cover, just to avoid things falling into the sauce (like dust or whatever).
8. Relax for 45 min, stirring once every 15 minutes and turning down the heat when simmering starts. If simmering began within the first 15 minutes, then the Lecsó is done at this point. If it began later, then add another 15 minutes so the initial cooking time is up to 1 hour.
9. At this point, if you are going to save Lecsó for later recipes, remove some to a cooling pot and set aside until cool enough to pack up and freeze.
For maximum authentic flavor, fry a bit of garlic, and Hungarian Paprika in rendered pork fat (from bacon) and add it to the Lecsó portion. Mix thoroughly so that the flavor melds as it cools.
 |
| Using a strainer gives the best results, but a colander will do in a pinch. Solids go back in the sauce, and the liquid is cooked down faster in a separate stew pot. |
The Second Simmer and The Straining
10. Now the rest of the sauce in the stock pot is going to be Spaghetti Sauce. Add spices you like best in spaghetti sauce, such as oregano, Italian seasoning, basil (from the garden if possible), and parsley. Allow to simmer for another hour.
At this point it's "too thin" to be spaghetti sauce and needs to cook down. But if you cook it for 6 hours, the flavors will lose some of their brightness and the loss of vitamins in the sauce will be higher. So I've developed an innovative straining method that allows the sauce to thicken faster. Nothing is lost, the strained liquid is added back as soon as it has thickened.
11. Now we're going to strain some of the sauce, not all of it, but enough to help the process of thickening. Take a wide stew pot, or large saucier, and put a strainer across the top of it. Ladle the liquid of the too-thin spaghetti sauce into it and strain the liquid from the solids.
12. The solids go back in the simmering stock pot of sauce. Repeat until the stew pot is about 3/4 full, or leave just an inch of head room.
13. The liquid in the stew pot, with solids removed, has less danger of burning, it may be brought to a full boil at medium-high (I use 7 or 6) and maintained at the boil until reduced by 2/3, that is, until only 1/3 of it is left. This will take another hour at least, check the sauce and the liquid every 15 minutes, stirring the sauce to prevent any sticking. Though, I haven't actually had any sticking, I always check anyway.
14. When the liquid is forming a "donut" shape, it's done. You'll see what I mean, because when it's thick enough, it will start to look it, and the boiling just looks different (see video). When it's thick and reduced, you can add it back to the stock pot.
15. Stir and taste for seasoning and spices levels. Assuming all is well, let the sauce simmer another 10 minutes, then add some more chopped fresh garlic (3 or more cloves, crushed), and turn off the heat.
16. After one hour, you can start packing everything up and freezing all but one container of it. This produces the approximate equivalent of 8 jars of spaghetti if you took some out, and at least 12 jars if you didn't.
Now you can start enjoying your spaghetti sauce and Lecsó creations. An easy dinner for a day like this is to remove a frozen pizza shell from the freezer, slather it with sauce, and grate some cheese on top. Maybe a topping or two... and sit back and enjoy your homemade pizza night!Freezers are risky, if you have a power failure, all your hard work can be for naught. Canning is more work but involves less risk of losing your investment in food. If you prefer to can your creations, see this guide.
The reason to do this in the summer is that the flavor is at its best now. If you do this in the winter, I recommend you add a bit of sugar to the recipe because the flavor of winter tomatoes, no matter how well raised, is going to be noticeably flatter. You might be able to make up to four more batches before the local tomatoes are gone. But don't delay too much, I promise the effort will be worth it.


