The Great Gluten Free Bread Machine Experiment - Part 6
 |
| Oat cinnamon raisin toast. |
So here I am again experimenting with a West Bend Hi-Rise Bread Machine! This one has two paddles and mixes much better. However still not as nice as having a mixer, but for the reasons already mentioned, bread machines are the way I want to go for now. As always, this is NOT an affiliate link or any other kind of ad. It's what I use. I'm happy to shine a light their way though, because this is a great appliance, worth the money.
I have three loaves to show you and an experimental recipe for one of them. One of the nice things about having your own machine is that you can use oat flour, if you tolerate it. Only about 10% of people with Celiac have a gluten reaction to avenin, the "gluten" in oats. And oats have a familiar flavor that many people like. GF bread manufacturers don't use oats because it's risky. Most farms rotate from oats to wheat or barley and back again on the same land. And no matter how good the weeding, a few gluten grains get mixed in with the oats.
To handle this problem, there is a movement called "Purity Protocol." This means the grains aren't rotated on the same land, so instead of rotating with oats/wheat, it might be oats/soybeans, which are much easier to tell apart. If you love the smell and flavor of oats and aren't on a diet that restricts grains, and aren't allergic or otherwise reacting to oats, then it can help to add oats to your gluten free arsenal of flours. Unfortunately in this experiment I learned that even PP oats aren't safe enough for me. It might be a reaction to all grains, but then why don't other grains do it?
Well, I try not to dwell on such things. I'm just trying to make a tasty loaf of bread that's better than store bought. Shouldn't be too hard?
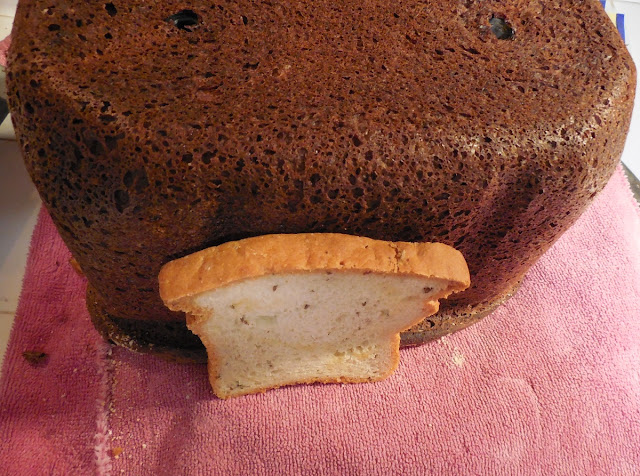
I made two versions of this cinnamon-raisin bread, and the first was taken from 125 gluten free bread machine recipes, but that entire book is sized for small bread machines, so it's kind of low and wide. Was really tasty, but it didn't look nice enough I thought. It made me realize I'd have to size up most bread machine recipes to fit my new machine. (That's easier said than done, but read on..)
 |
| Half size loaf of cinnamon raisin bread. Yummy but very flat. |
The second cinnamon raisin bread was made with a significant portion of oat flour. This one is paler, didn't form a "valley" on top, but I think it was underproofed (the yeast didn't have enough time to develop). And it should probably have had more water in it. The recipe I will give is experimental, I haven't got the knack for this bread yet.
Finally, I calculated out the larger loaf size for the multigrain / substantial sandwich bread in Part 5. That brings me to the lesson for today: baker's percentage. I won't claim I know all about baker's percentage but I do know that if you want to scale a recipe up and down, you need to use math, and that math is called baker's percentage. So for example, if you know how much flour you have, then you know how much of everything else you need to make a specific baking product (like bread or pretzels). Baguette dough has a certain percentage, and bagel dough has another one.
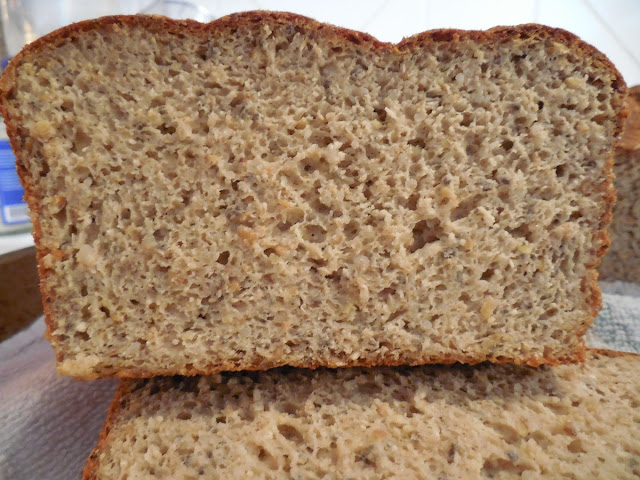
I added 33% by weight to this bread recipe and this is the result. Pretty good, but not perfect.
Still beats anything you can buy for flavor. But there are a few problems in the new machine. The top formed a valley. The inside is a bit too sticky-moist for my taste, and it doesn't toast as nice as before. Still the machine managed to give me a crunchy crust and the bread holds together without crumbling or falling apart if you spread butter on it. The problems are manageable.
The only problem that I don't know if I can manage is that it tends to fall and shrink, even beyond the normal amount you'd expect. Take a look on the right and see how it rose beautifully, and then shrunk. That's more than even whole wheat bread does.
To use baker's percentage, you need a gram scale. You don't need to have it accurate to the hundredth decimal point, but a gram scale available at any kitchen store for around $10 will be fine. I'm comfortable with gram scales because I used to use the ketogenic diet in a medical way, which means all my recipes were measured out. It was a pain, but I got rid of daily migraines with it. That was a pain too. If math causes you discomfort, then just read through and when I have an experiment that I call a "recipe" just use that.
I've started to give recipes in grams because I've been using baker's percentage to make educated guesses about where to make changes. Until now, it was "behind the scenes" so now I'm explaining it. Please take the time to read the link above and possibly also this.
There are still questions. Like, why isn't egg a liquid? I see BPs with egg having its own line item. Not all the intricacies are clear to me. I'm sure eventually I'll learn enough about it, but I'm still a beginner in this area.
One thing I've learned from the baker's percentage is that gluten free bread absorbs much much much more water than wheat bread. I used to notice this with rye bread too. The reason most bakers are thrown by rye and whole wheat bread, even if made entirely by hand, is that they don't add enough water. Most recipes are geared toward white flour. So the yeast are in too dry an environment to grow nicely. We focus so much on getting "bubbles" to form in our bread, but water is also a "bubble" and a gluten network can hold it better without absorbing it away from the yeast. Gluten free flours aren't like that. They need more hydration.
I'll go out on a limb here and say that I think you should never attempt a bread machine recipe with a hydration less than 110%. If your plan is below that, use a mixer.
The little paddles of a bread machine will just tear the bottom of a stiff dough and you'll end up with craters like I showed you before. While most bread recipes have a hydration of 70-80%, gluten free bread machine recipes should be at least 110%. Anything lower and your dough will be too stiff to be mixed. The paddles in bread machines are meant for the elasticity of gluten which eventually forms a ball of dough and then spins, is kneaded, on the paddles. Gluten free dough won't do this hardly ever.
So the mixing problem with bread machines and gluten free bread is due to the design of the machine. Bread machines don't have dough hooks. They have paddles. If you'd rather use less water and want a more artisan result, use a mixer and keep the hydration around 90%. Even with a mixer, you still have a higher hydration with gluten free dough. It simply absorbs more water.
That doesn't mean it's a pointless machine. It means recipes should be adjusted to suit it, so that, even in the bread machine, mixing can be thorough.
 |
| Cinnamon Raisin Bread with Oat flour and Rolled Oats. |
2.5 Lb Fortified Cinnamon Raisin Oat Bread Machine Experiment 6
Machine: West Bend Hi-Rise
Cycle: Gluten free (you will need to help the mixing, this is a stiff dough)
Dry:
1 1/2 cup Namaste Flour (230g)
1 cup Rolled Oats ground, leave about 4 Tbsp as rolled oats (130g)
1 cup Almond Flour (120g)
1 1/2 cup fresh ground Buckwheat Flour (250g)
1/2 cup collagen (40g) - or use what protein you like
*while not as nutritious, Knox gelatin would be an affordable substitute
1 cup ground flax (130g)
2 Tbsp psyllium (30g)
3 Tbsp coconut flour (40g)
2 tsp salt (10g)
Wet:
3 eggs, warmed in a bowl of hot water before use (160g)
2 cups water (if you make this, use more water, this was 460g)
2 tsp vinegar (10g)
1/4 cup oil (50g)
Yeast:
2 packets yeast (Active yeast was used, about 14 grams)
1/2 cup water, warmed, not hot (120g)
2 Tbsp. sugar (30g)
1 cup raisins, moistened (150g dry wt.)
Warm the eggs, and grind any flours needed.
Combine the dry ingredients in a large bowl.
Combine wet ingredients in a smaller bowl.
Warm the water for the yeast, and test with your finger or a thermometer. It should be no hotter than you can comfortably hold your finger in.
Combine yeast sugar and water and allow to begin foaming.
Remove the insert from the bread machine. Add all the liquids with the insert outside the machine (lessens dripping). Add a bit of flour and return the insert to the machine.
Set for the cycle, and press start. When the machine is kneading, carefully add more flour as it kneads until it's all combined. Help the machine to knead by scraping down the sides.
The gluten free cycle has only one knead and rise, so at this time add the raisins and watch to be sure they get mixed in. I had to remove the dough and mix them in by hand.
Close lid and wait for cycle to complete. Use a thermometer to take the temperature of the loaf in the center. It should be 205-210 degrees F. If not, then bake longer using the bake cycle. Check every 15 minutes.
When the temperature is right, allow the bread to rest in the pan for 30 min, then cool on a rack for at least 90 minutes before slicing.
Bread Machine Baking Series
PDF Printout Recipe for 2 Lb Rice/Buckwheat Sandwich Bread https://nixgluten.blogspot.com/2020/10/rice-and-buckwheat-bread-recipe-gluten.html
Part 1 Raisin Bread https://nixgluten.blogspot.com/2019/10/the-great-gluten-free-bread-machine.html
Part 2 Airy Fluffy Gluten Free Bread https://nixgluten.blogspot.com/2019/10/the-great-gluten-free-bread-machine_29.html
Part 3 (Failed, lessons learned) Cinnamon Raisin Bread https://nixgluten.blogspot.com/2019/10/the-great-gluten-free-bread-machine_31.html
Part 4 High Fiber Bread https://nixgluten.blogspot.com/2019/11/the-great-gluten-free-bread-machine.html
Part 5 Stand Mixer Sandwich Bread https://nixgluten.blogspot.com/2019/11/substantial-sandwich-bread-recipe-part-5.html
Part 6 Oat Cinnamon Raisin Bread https://nixgluten.blogspot.com/2019/11/the-great-gluten-free-bread-machine_10.html
Part 7 Largest Loaf 3 Lb Machine bread https://nixgluten.blogspot.com/2019/11/the-great-gluten-free-bread-machine_12.html
Final Recipe Rice Buckwheat Bread https://nixgluten.blogspot.com/2020/02/gluten-free-whole-grain-rice-buckwheat.html
Bread Mix, Bob's Red Mill https://nixgluten.blogspot.com/2021/05/product-review-bobs-red-mill-homemade.html


